15 November 2016
No. 5
Building an electronic banjo out of paper plates
This weekend at HackPrinceton, my teammate Benny Yan and I made a prizewinning electronic banjo. It's not an electric (amplified) banjo. The difference is when you hold down frets and strum strings, the sounds it plays are mp3 files, not amplified string vibrations.
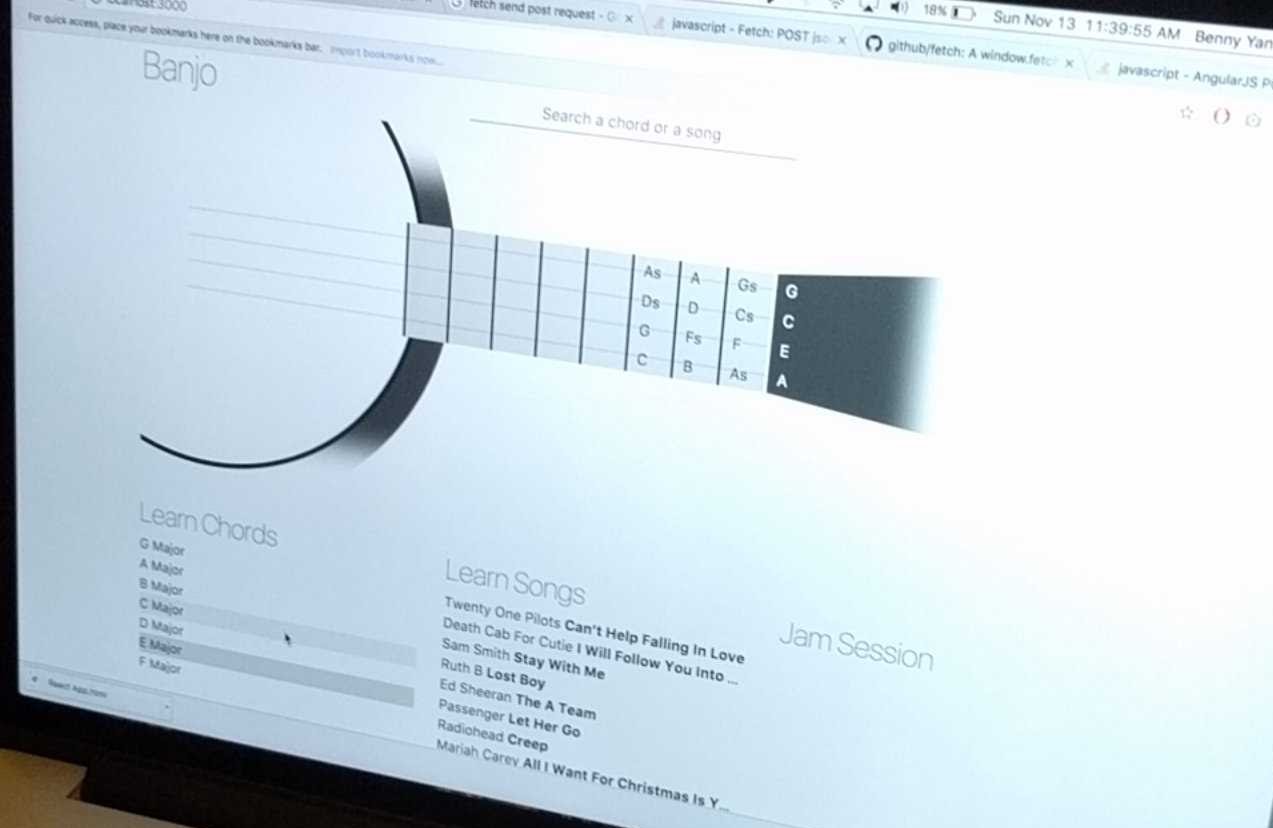
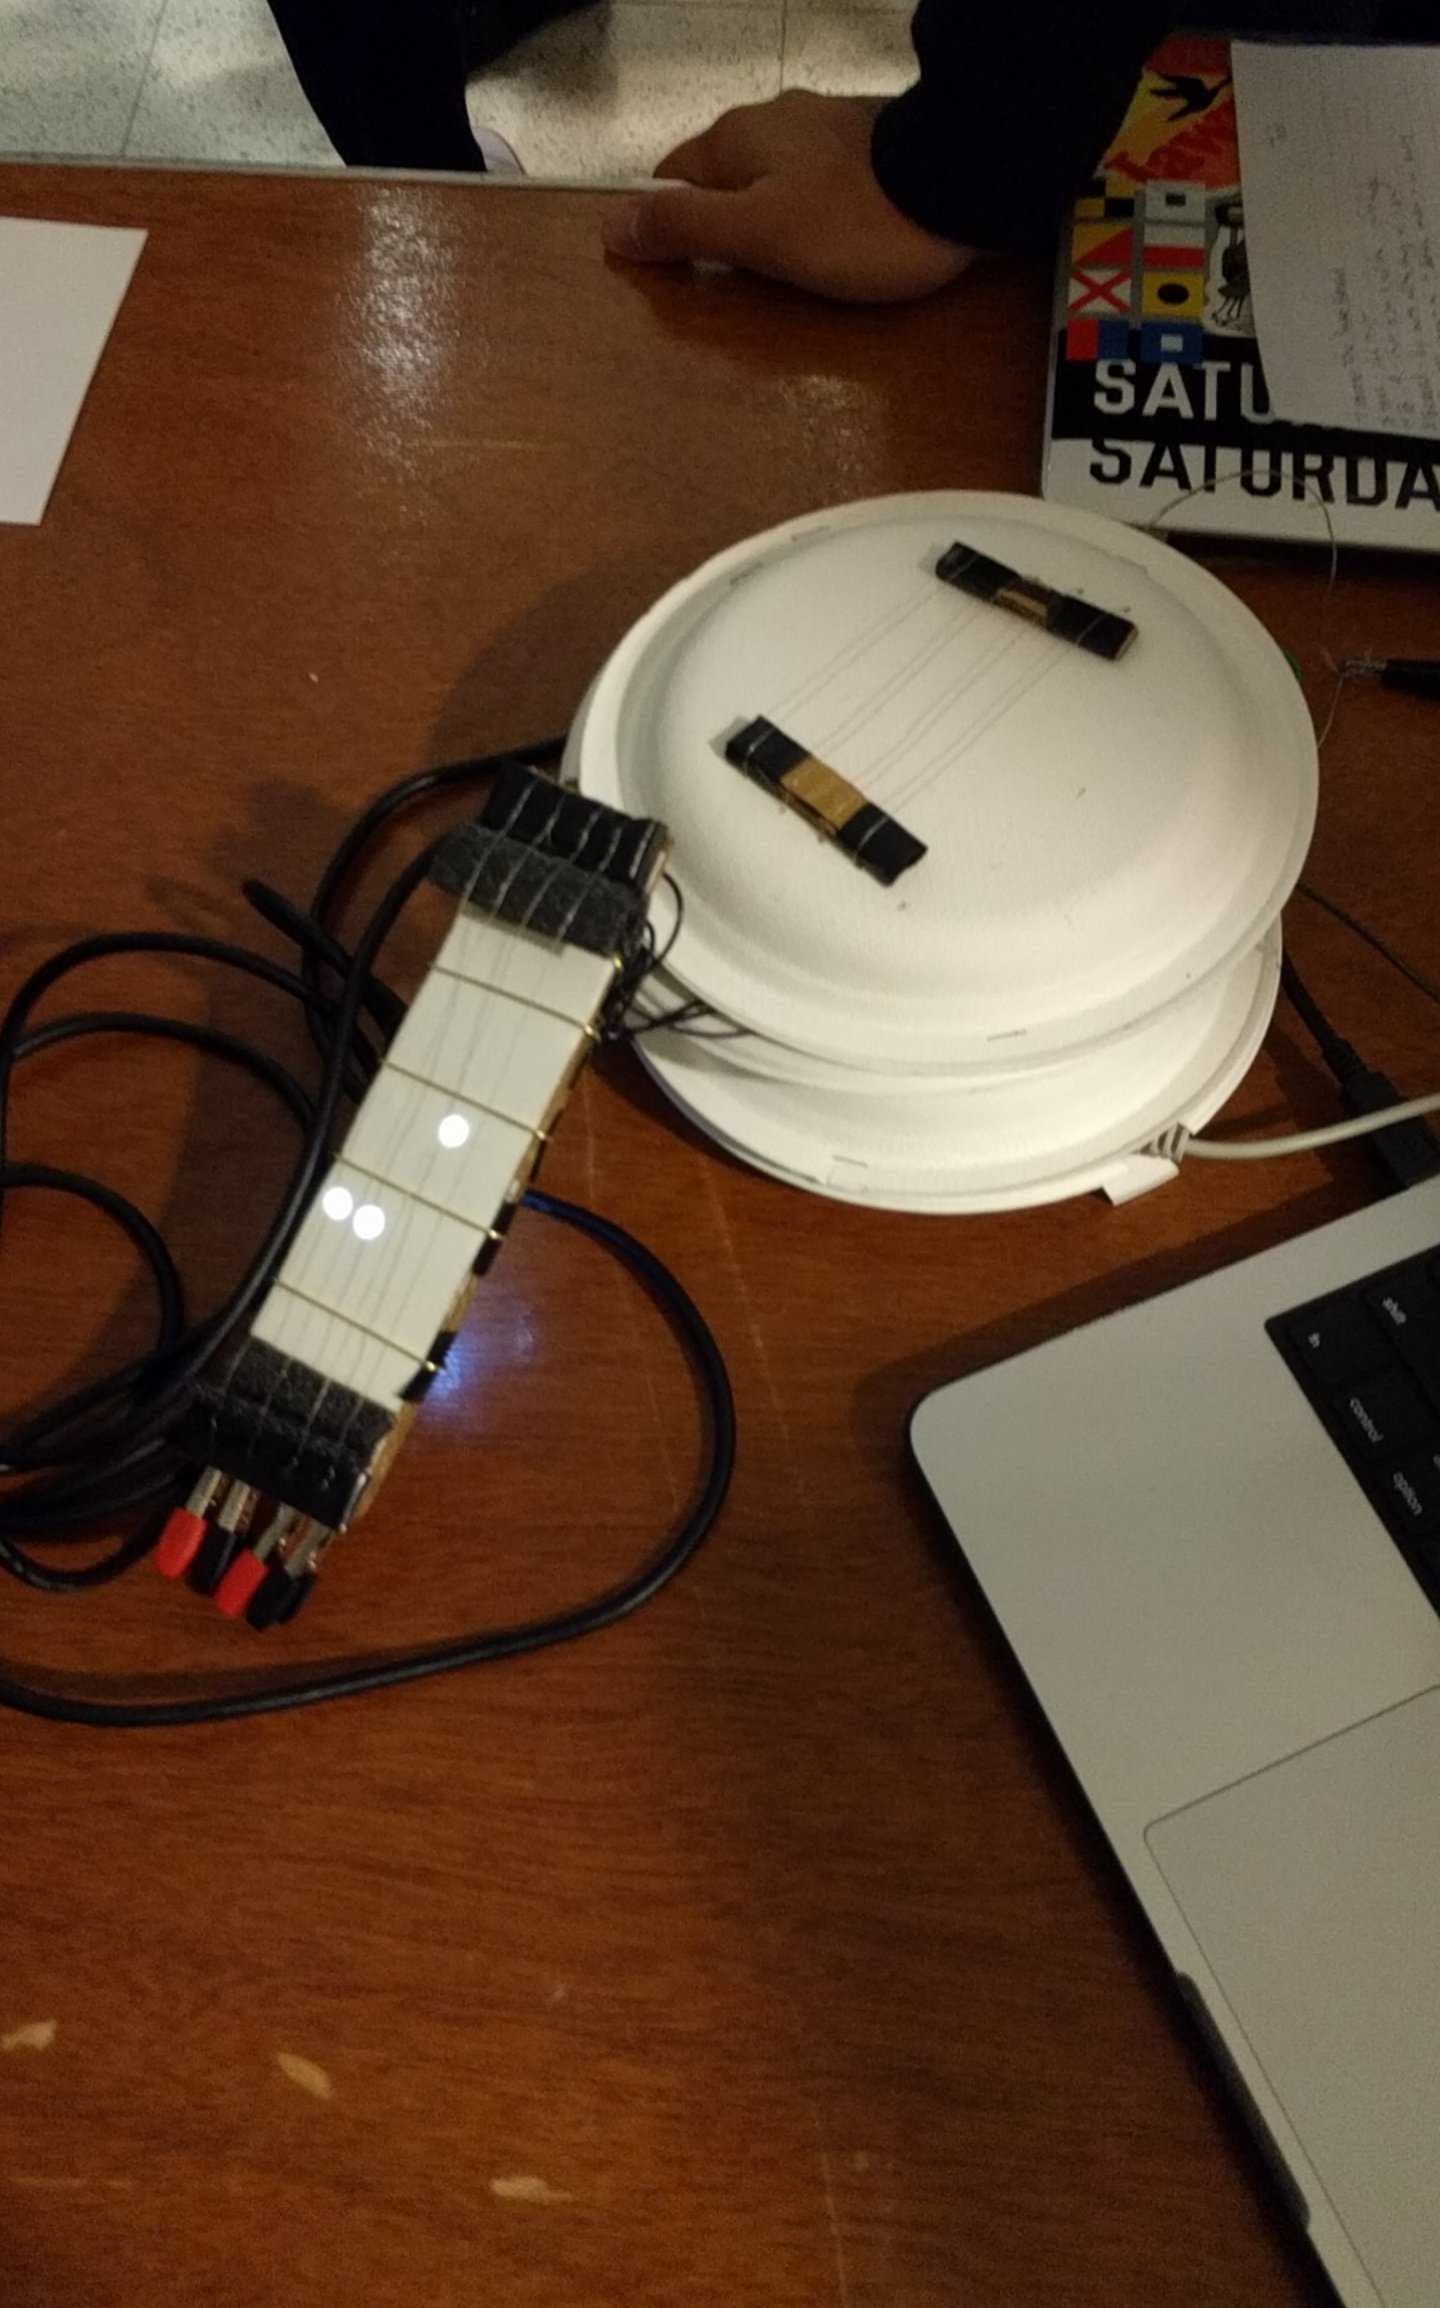
In addition, there are LEDs under the fretboard that light up to show you where to place your fingers (in our demo, we showed chord positions, but I have a few other ideas for it that I think would be cool). We also had a nicely designed UI that you could use to show which strings and frets were being pressed down, as well as selecting chords to view and have displayed on the banjo's fretboard, and a list of songs to go through and show chords and lyrics for in realtime.
Before I get into it though, I'd like to thank the HackPrinceton organizing team, especially all of the hardware lab mentors. Those guys are some of the nicest people I've met, and I'd probably have either spent an extra 5+ hours debugging hardware or just not been able to finish without their help debugging two hardware bugs.
What we used
- Frontend:
- React
- Babel
- SASS
- Backend:
- Go
- gin-gonic/gin
- tarm/serial
- Hardware:
- Electronics:
- Arduino Uno x2
- White LED x12
- 1k Resistors
- Materials:
- Wire (lots)
- Paper clips (brass plated)
- Paper plates
- Cardboard
- Springs
- Foam
- Electronics:
There's not a whole lot of complicated electronics here, and realistically you could probably use one arduino mega instead of two unos. Most of the time I spent on this was painstakingly soldering everything together, placing all of the layers down precisely, hardware debugging (encountered the weirdest hardware bug I've seen yet), and figuring how to orient everything properly (springs, clips, wires). The backend code itself was written pretty last minute, which looking back on it, could have gone pretty badly, but thankfully it ended up working out.
How we made it
I worked on the hardware and backend, and had very little to do with the frontend, which Benny made, but here are the steps I took for the hardware:
First, it was important to have an idea for how the fretboard worked. There are a few ways to do a fretboard which immediately come to mind, but the way we finally implemented it was by far the best way to do it in my opinion. I have a lot of projects that I've done with reflective IR LEDs, so at first I thought of using those as a range finder since we could use those to find the range on small instruments (7cm from a uke or banjo head is a decent amount for demo purposes) or to use a system with force or light sensitive resistors under each fret, but these methods all have issues with emulating how a real string instrument would have its audio affected.
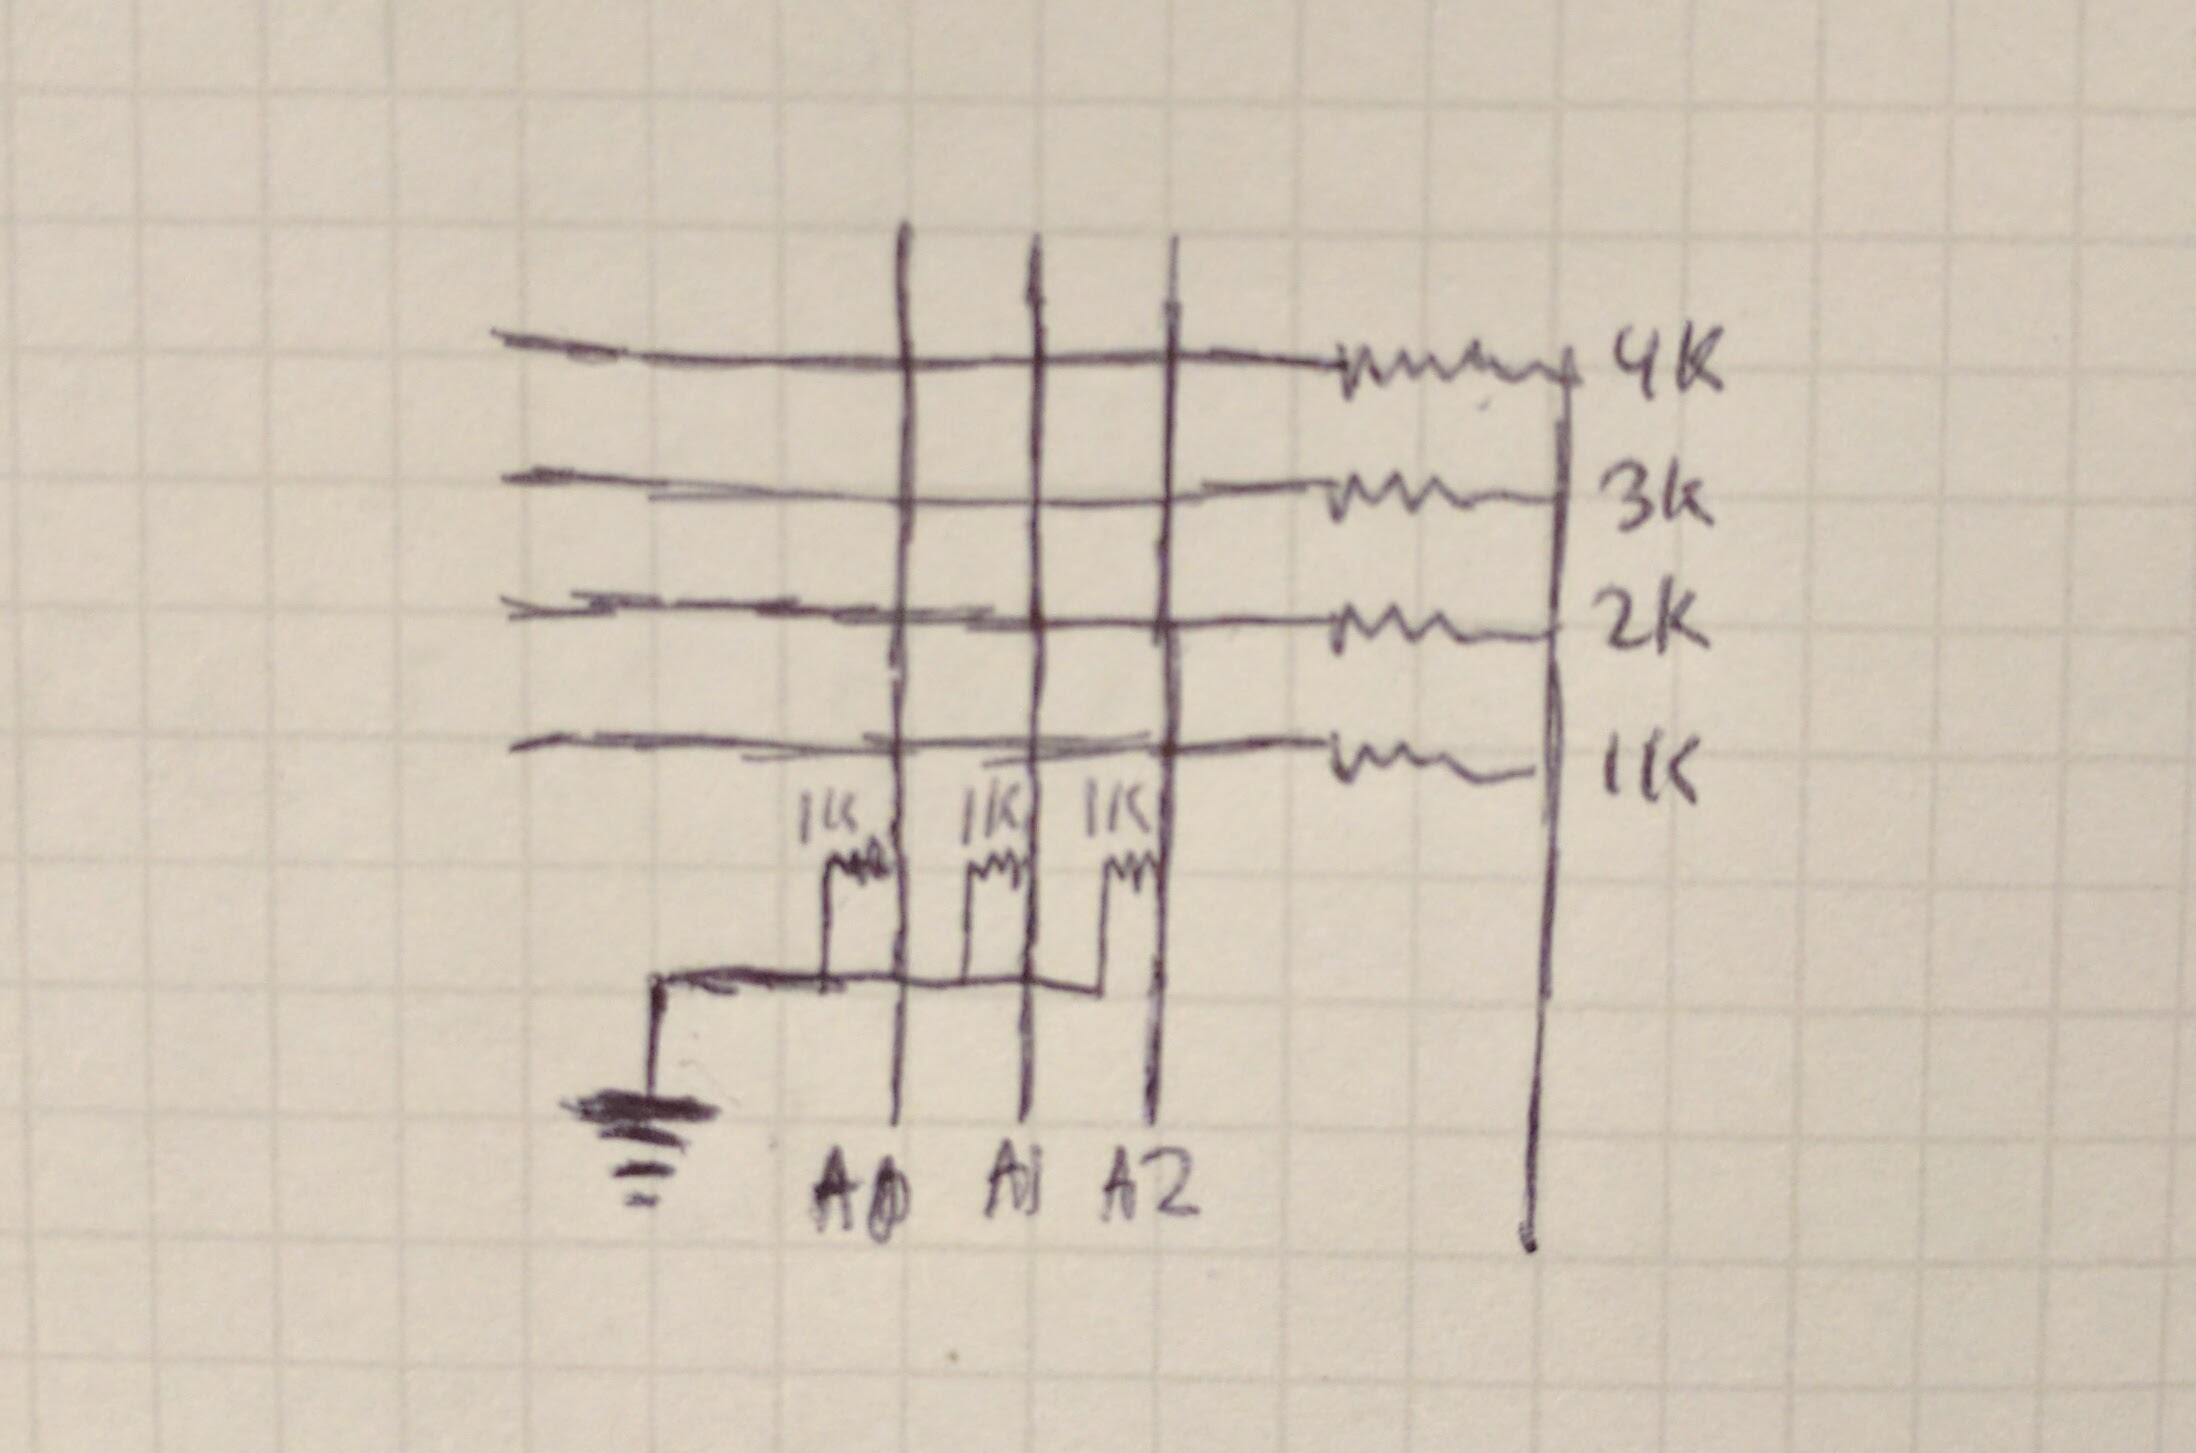
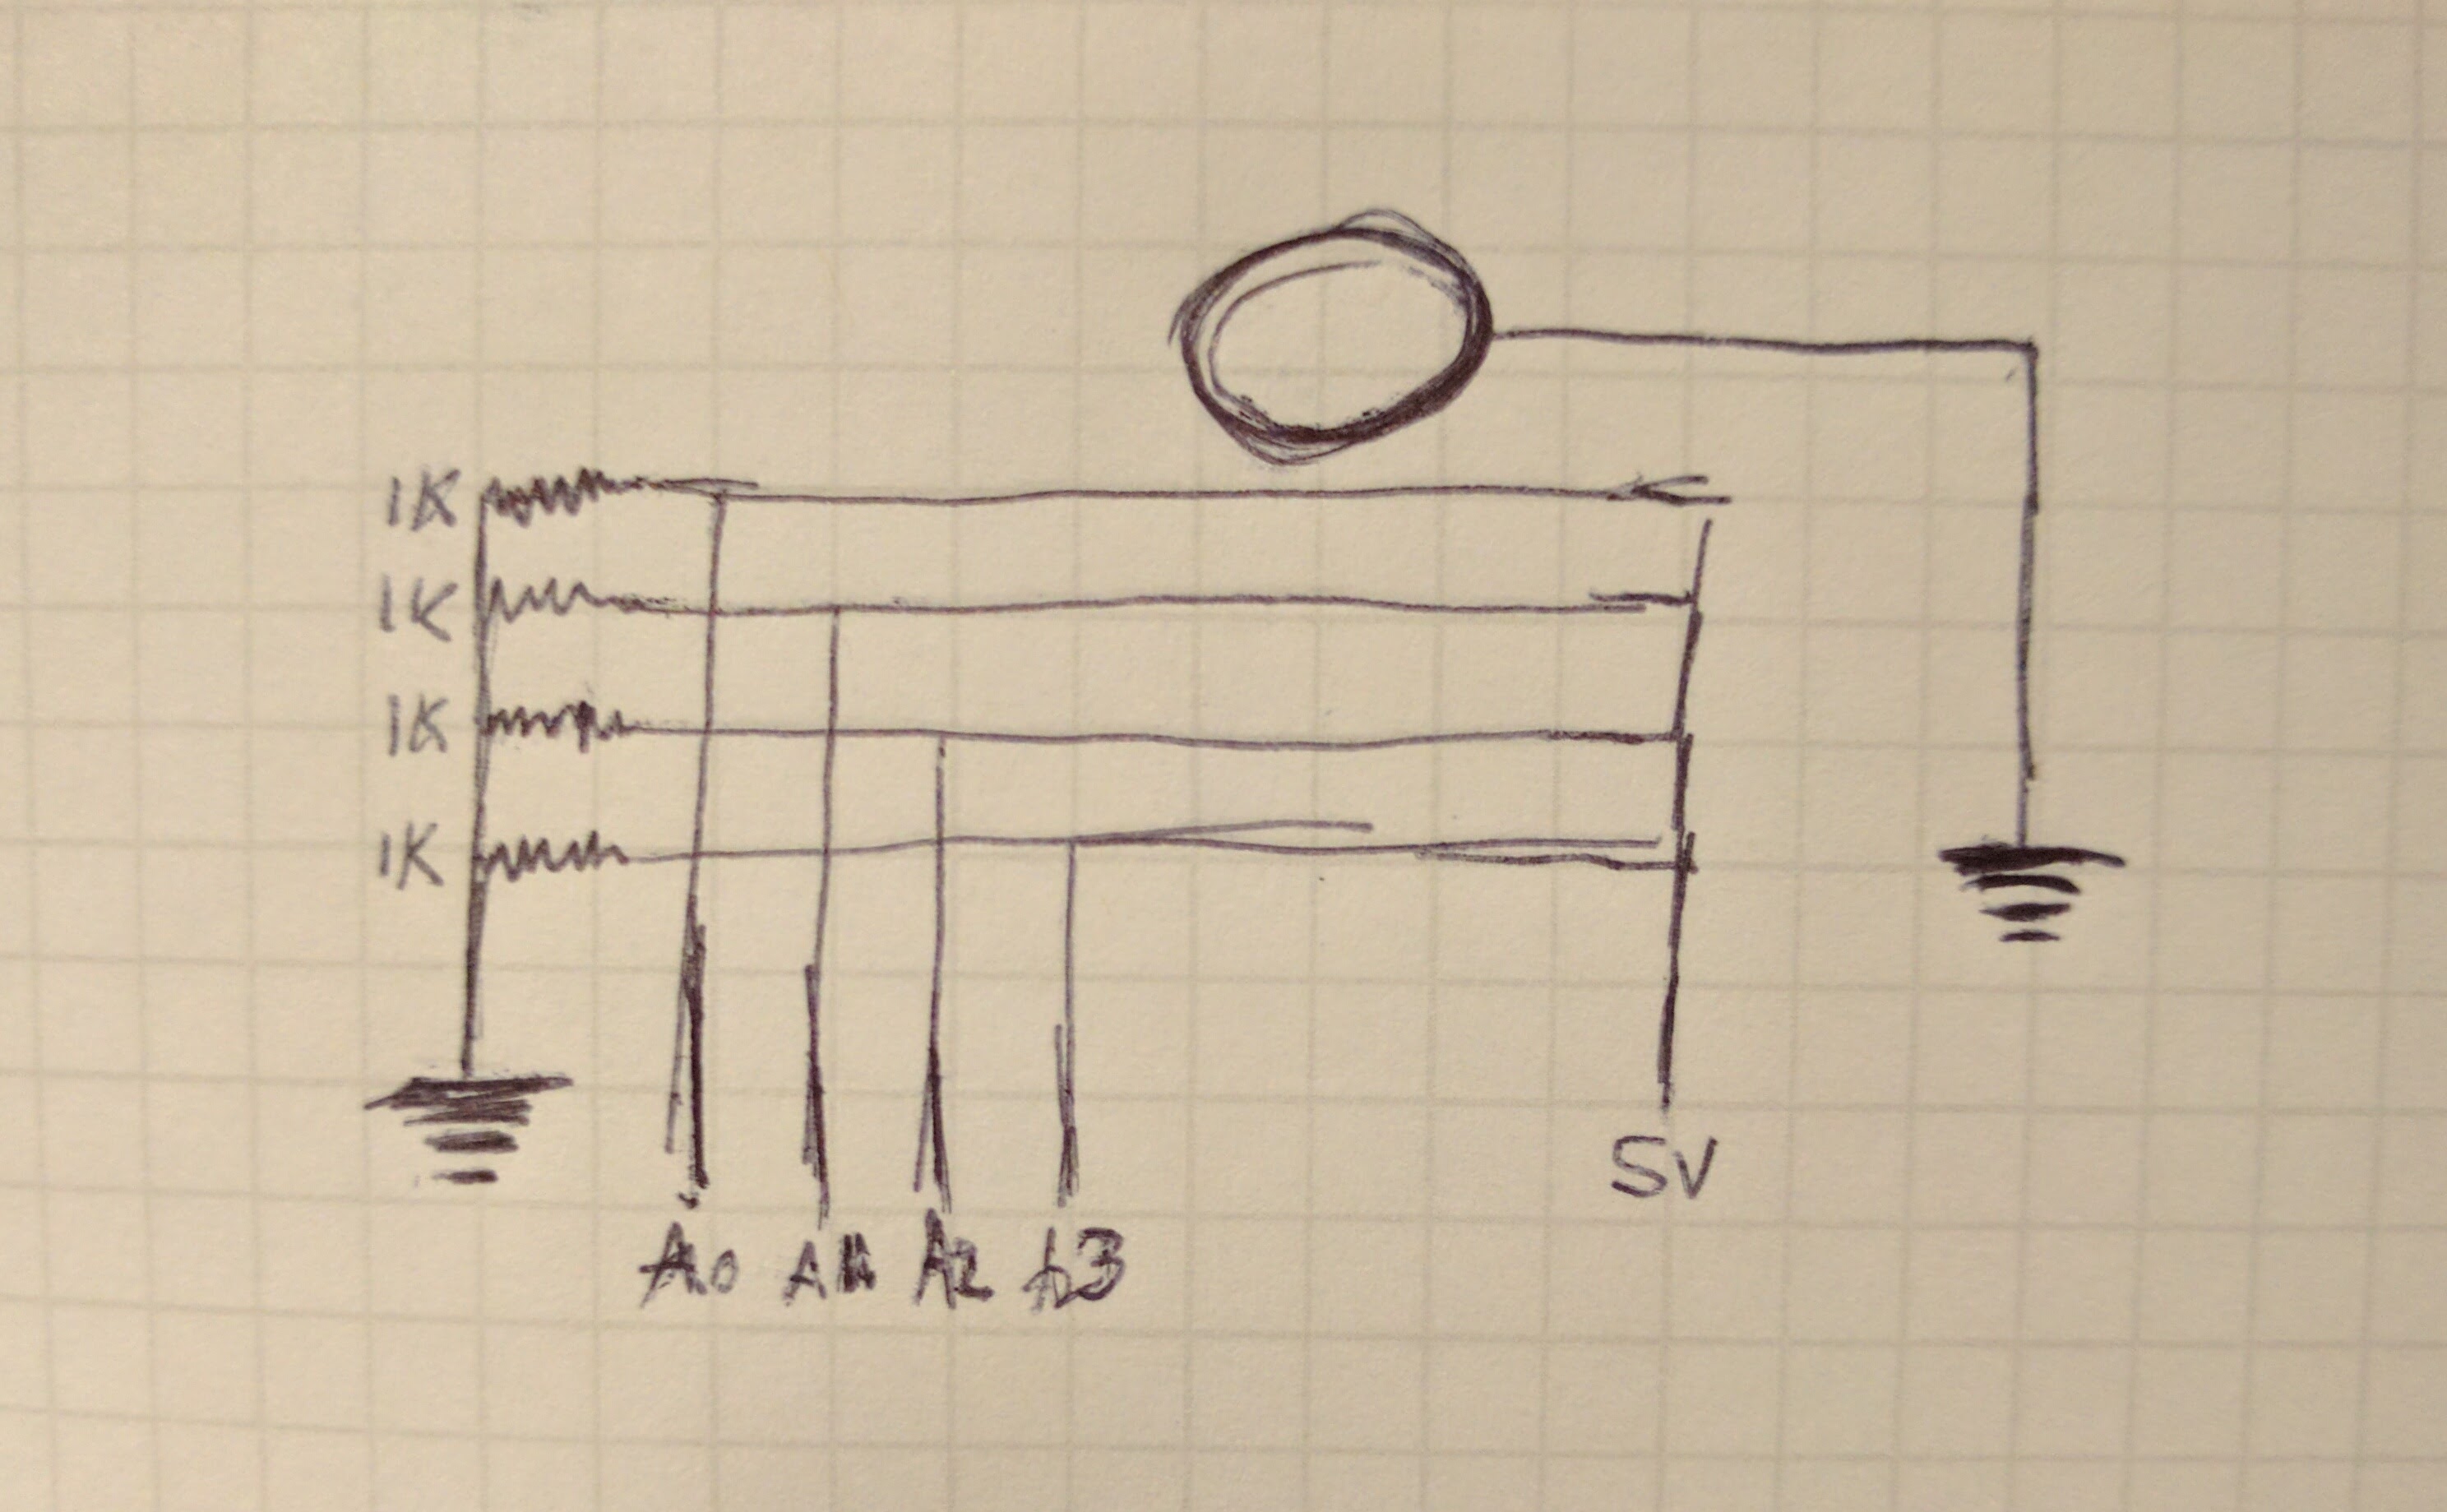
I ended up going with a system with much less complicated components. Simply using 4 strings with 5v out and different resistances on each string (not grounded), and having each metal fret piece connected to an analog input pin on the arduino means that you get lifelike and accurate strings. Based on which analog pin you're reading from, you can figure out the fret number, and based on what the voltage reading is, you can figure out which combination of strings is being pressed. It's also very accurate in how it works compared to a real string instrument because the way this reads string/fret combos is by the string being touched to the fret, which (aside from a few techniques), is how notes are normally played on string instruments.
So after hashing out how I wanted the frets to work (since without the frets, there's not a whole lot you can do) I moved on to making the strings for detecting strumming. I first tried reading analog input on all of the strings and putting 5v through a wristband on my hand, but it's much easier to reverse that and put 5v through all of the strings and ground my hand, since my hand isn't very conductive. This is pretty similar to how a makey-makey works, actually. I used a 1k pulldown resistor and analog input, since I was going to need two arduinos for this project anyways, but you could change the resistor value and use digital pins instead.
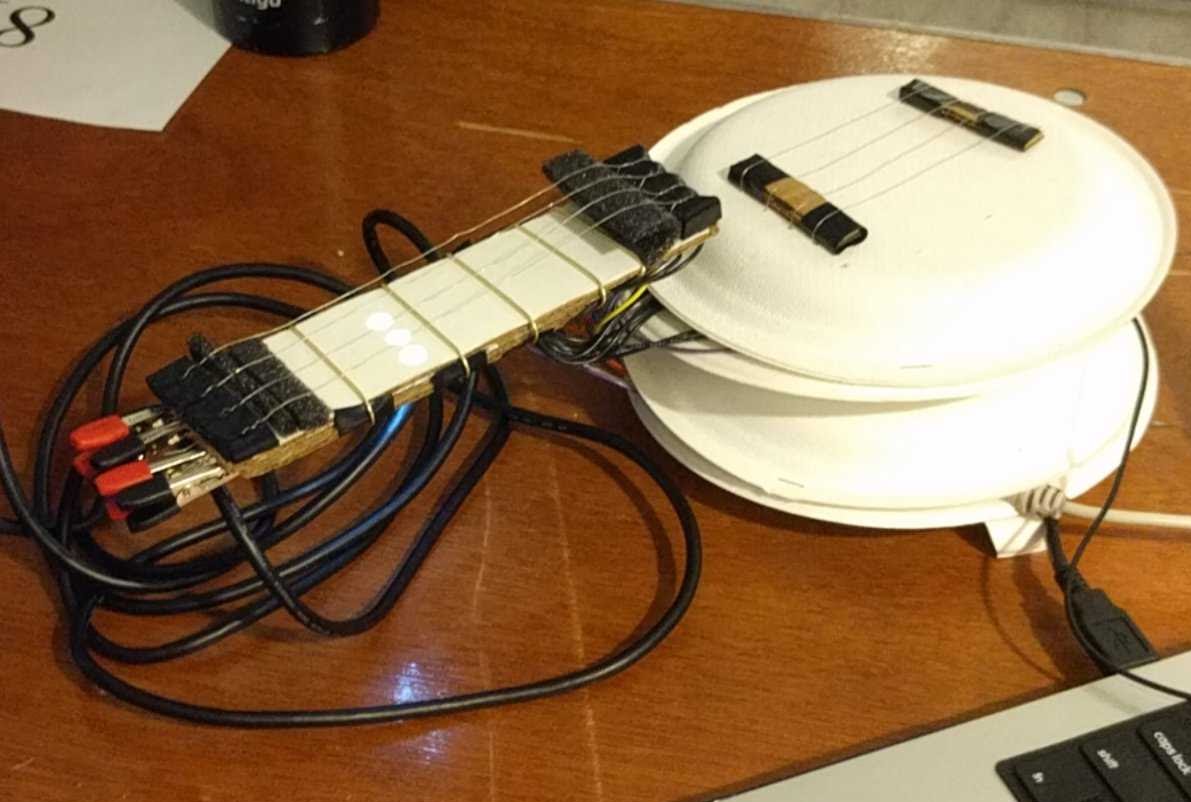
The fretboard was made by first hollowing out the space for the LEDs on two layers of cardboard, inserting them, and placing a cut sheet of paper plate on top (Benny did this), then the LEDs had to be wired up, cut, soldered, covered with electrical tape, and the next layer (frets) had to be added, cut, soldered, wired, then the strings on top of those had to be added, cut and soldered and wired to the arduino as well. I'm not the quickest, so at one point I spent 4 hrs straight just cutting, taping, and soldering wires.
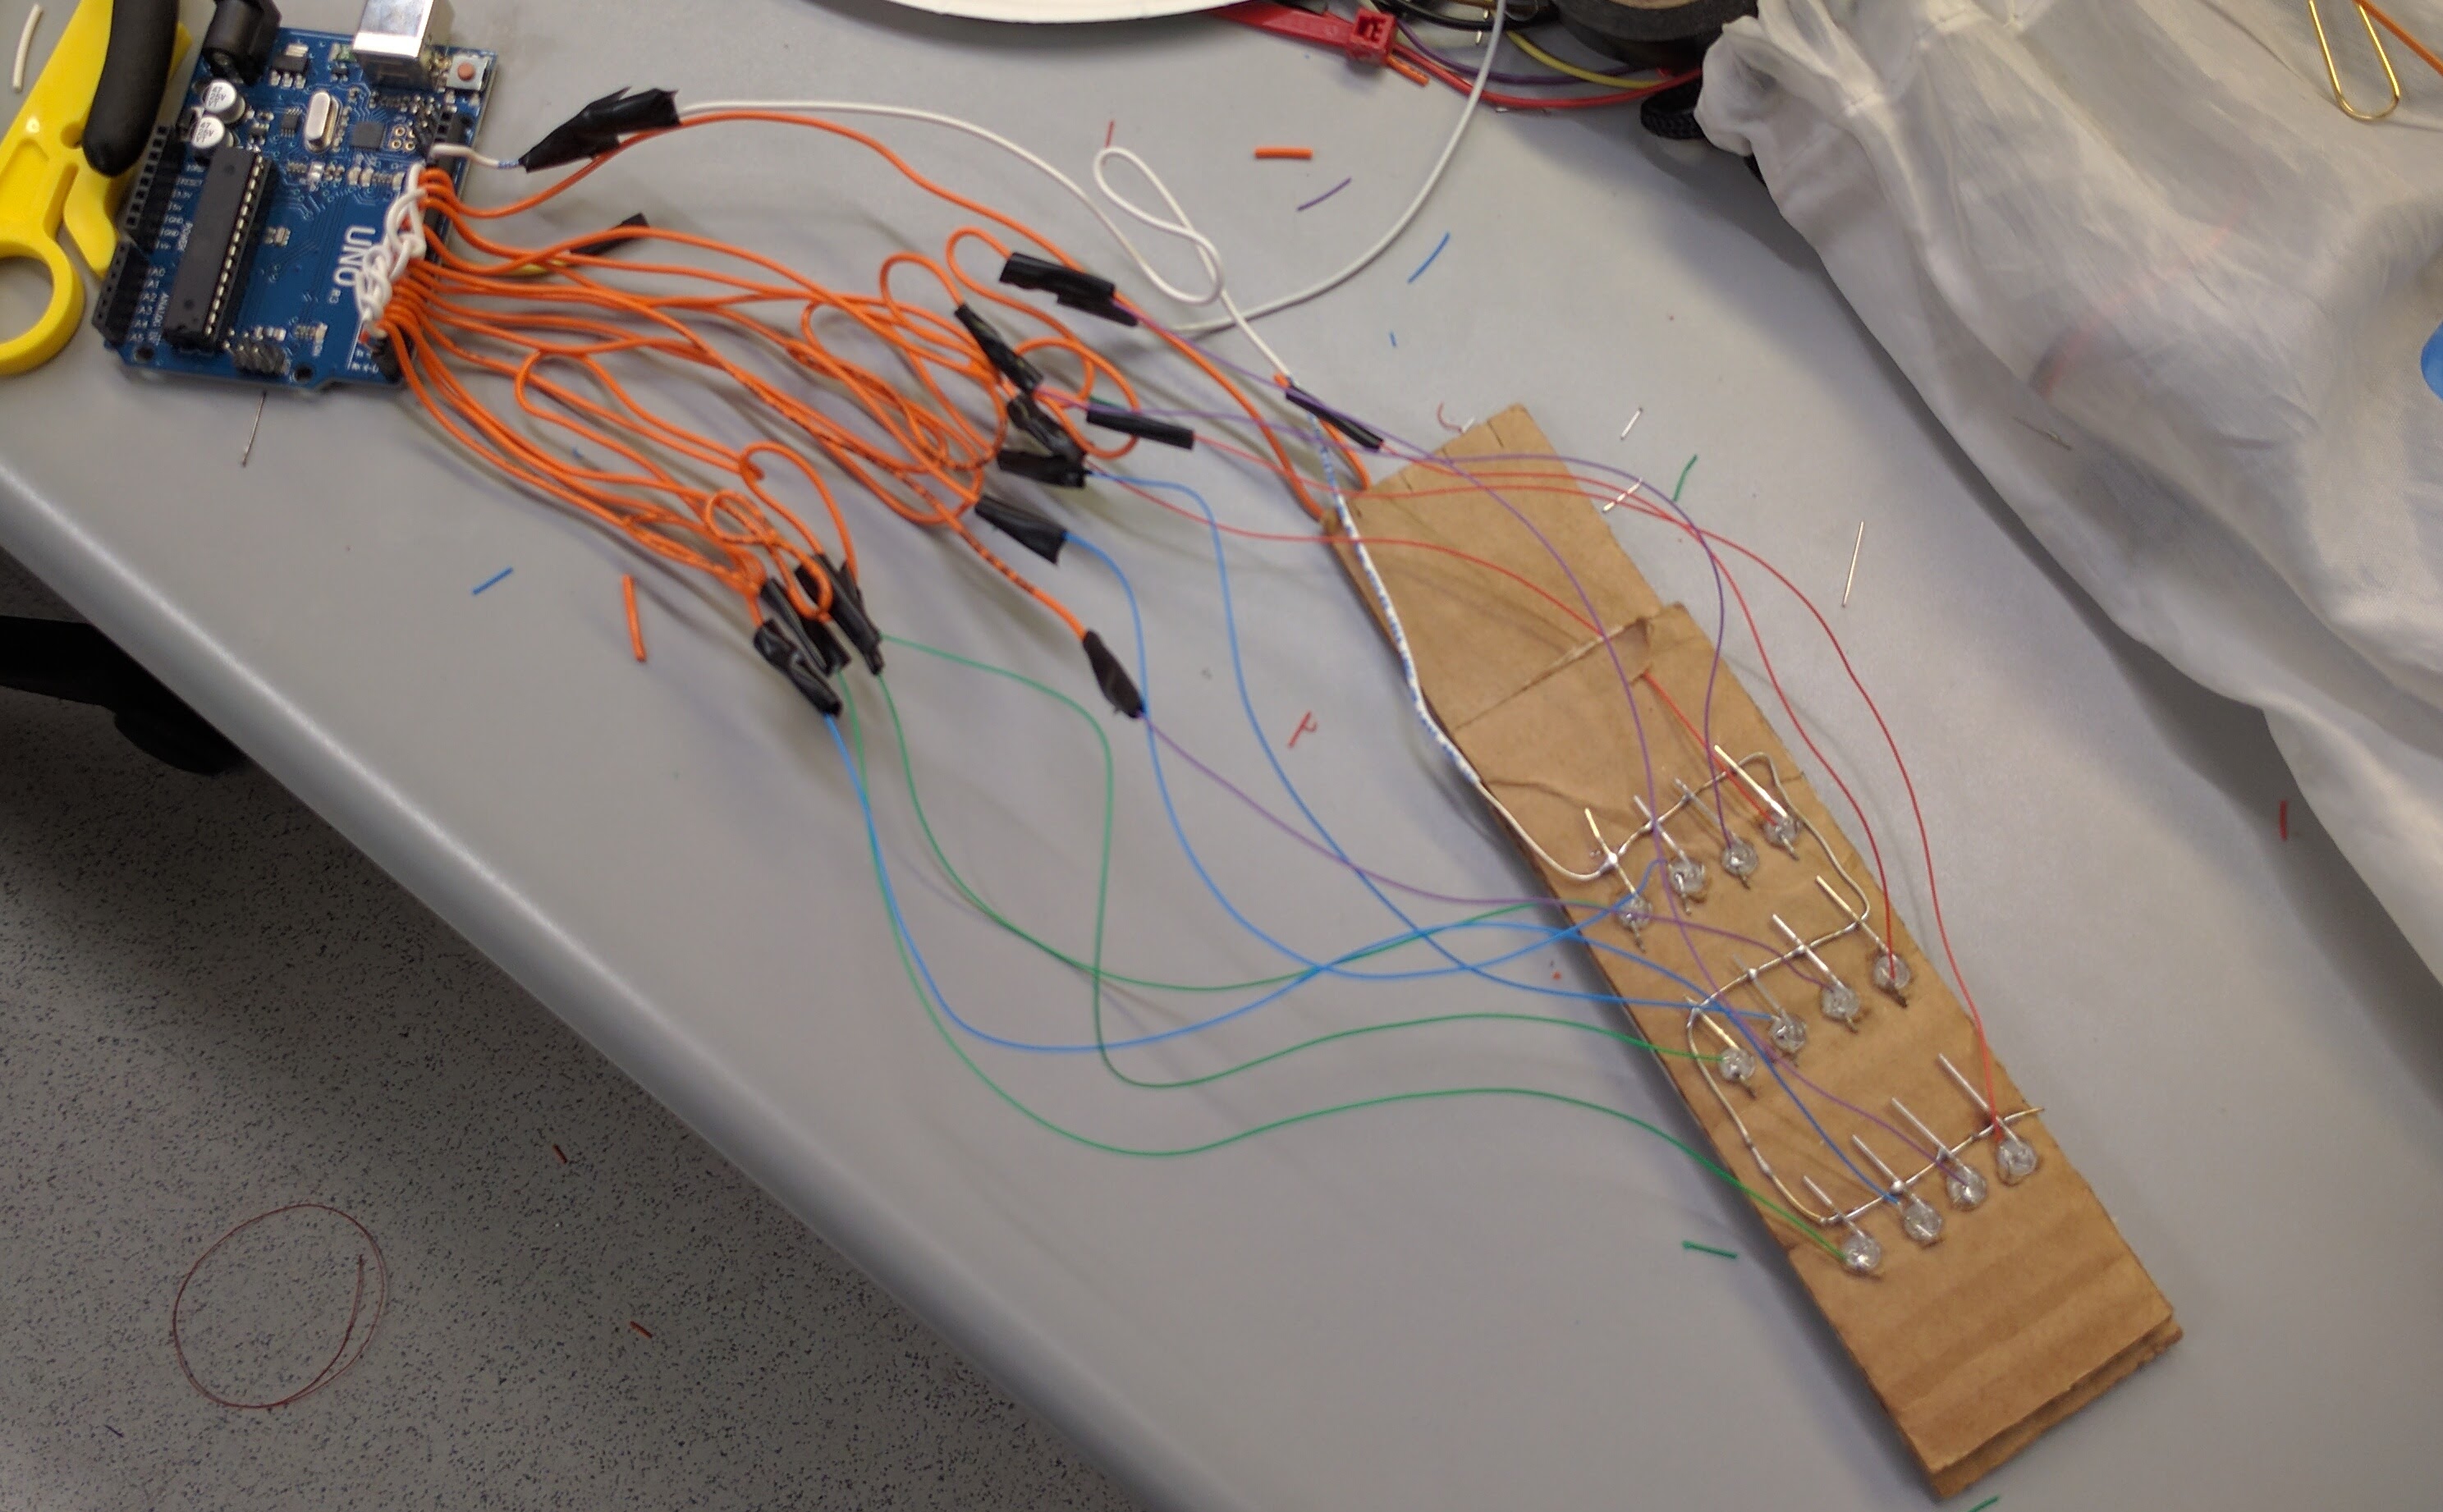
During this time, I was also testing the wires to make sure I didn't miswire something before soldering. At one point I taped all of the thin LED wires (that took up less space on the fretboard) to the thicker ones that would go inside the arduino pins after twisting them together, and had to untape, solder, and tape again, since they would lose connections at some angles after being taped. So there were a few other things that took up some time.
The code
I didn't write any of the frontend code, but basically how it works is the frontend continuously sends a GET request to the server to get which strings/frets to highlight on the webapp, and sends a POST request telling the server what LEDs to light up when it wants to light up the fretboard. This allows you to do things like select different chords and have them displayed on the banjo in realtime, as well as showing the tab for the chord on the screen. There was also a feature for playing songs and having the webapp show the user which chords and lyrics to use in realtime.
Benny's design and frontend code were nice and polished; the backend on the other hand, was incredibly rushed. The arduino files were written as I went and weren't too bad since I had to write them to test the code. The server itself however, was written pretty quickly, and I would reccomend restructuring large amounts of it if you're going to actually use it. It basically opens up one serial connection to the fretboard uke, one to the string uke, and starts reading in data and parsing it as JSON. The server's running at the same time in a goroutine and basically just serves up the last read data, formatted properly into JSON for GET requests, and for POST requests, simply writes the correct LED to light up to the fretboard arduino over serial.
The wonky part is the math used to calculate which frets are being played. It was getting pretty close to presentations, so I used some hackathon quality logic to go with my hackathon quality code, and didn't bother using math to calculate which string combination would create which analog value on the fretboard. I ended up just getting a few combinations of frets (e.g. 0, 1, 2, 3, 01, 12, 23, 012, 123, 0123), manually pressing those down, getting an approximate value, and giving it a short range around that, and just checking which range a fret read in, and seeing if it was in one of those ranges. As a consequence, since I forgot 03 as a combo, holding down the top and bottom strings on a single fret worked, but I don't think we even thought to test that, it was more like testing the first fret on the first string and the third fret on the fourth string, so it worked out all right.
The results
We presented pretty well to the judges prior to the closing ceremony, and HackPrinceton actually had a private judging prior to the closing ceremony, so the results were decided before we went on stage, and we did well in that. For the closing ceremony though, we had 2 minutes to present, went on stage, immediately tangled wires with the hdmi, usb, etc., wires on stage, took about a minute to plug in the hdmi, and fumbled through that presentation so badly that if we were judged based off of that, we wouldn't be finalists. We ended up doing pretty well though, Benny won us the best design prize, I won us the best DIY prize, and together we got best overall. A great ending to HackPrinceton part 2: Electric Boogaloo.
The weirdest bug ever
So while I was working on wiring the fretboard, I was also testing the wires to make sure I didn't have to undo the whole thing after I was done and realized I made an error. After I got to the stage where I put the LEDs on, connected them to a single ground, wired the positive ends up to individual thin wires into individual thin wires into the digital ports on the fretboard arduino, I moved on to the frets themselves. I placed a layer of electrical tape on the wire, and added the paper clips, which went on the front of the neck and wrapped around to the back, and actually looked pretty solid as frets. When reading input from the frets, however, it turned out that all three frets gave nearly the same reading... (nearly the same reading as opposed to exactly the same reading, I assume because of the built in delay on analogread).
After some lots of hardware debugging, it turned out that the three frets were grounded together... through the wire that grounded the LEDs. That wouldn't be so crazy, except each fret had a layer of electrical tape covering it entirely from the LEDs and their wires. Adding two more layers of tape did the trick, so I can only assume that a combination of the tape being on the thinner side, being stretched, and firmly pressed (the paper clips held on pretty tightly to the neck) caused a leak.
Future Ideas
Here are a few ideas that I had thought of while making this project. Keep in mind that these are untested, and I'm just a CS major who does hardware at hackathons, so these might not be 100% accurate in implementation. These were ideas I discarded because I knew we didn't have the materials/time, and they were plans for muting the strings and using springs for analog strums.
Muting strings is a pretty big thing in playing guitar, and probably also in banjo playing, and it's where you put your finger on top of a string and press gently but not hard enough to touch the string to the fret. As a result, you dampen the strings by causing almost all of the vibrations to travel through you. This would be checked for by checking the voltage that comes through the other side of the string. You could probably check for this by grounding yourself, and also reading in voltage from the end of the strings on the neck of the banjo. Then the strings you were touching would have different values than the ones that didn't. You'd also be grounded if you were touching the strings to push them down to the frets, but you'd know that they were pushed to the frets, and there wouldn't be any scenarios where they'd be pushed to a fret but not touched.
For using analog strums (e.g. to know how loud to play an mp3 based on the strength of the strumming), using something similar to how an electric guitar works would probably be the best method. Placing pickups under strings would allow you to see if the string was being pulled up or down, and how much, based on the motion of the magnetic field generated, and the resulting current that would go to the amp (or in this case the voltage-reading analog inputs on the arduino, since v = ir). You could alternatively attach springs to the very end of the strings, and use a hall sensor to determine the change in magnetic field caused by the spring's expansion and contraction. Again, these are untested, so they may not work exactly how I describe.